World Map Generator Part 1 - Project Structure and Overview
 |
|---|
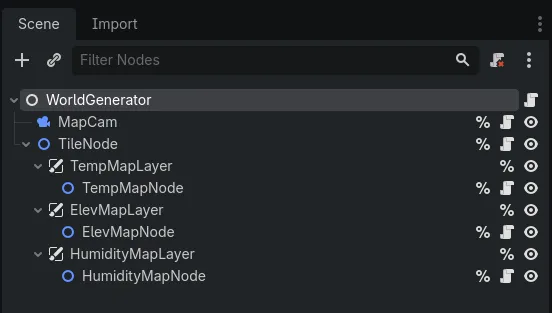
| The scene tree of my World Generator project, which (kinda sorta) follows the Model View Controller pattern. Don't worry about all the parts where it doesn't. |
Previous ||
To start, let's take a look at the basic architecture of the project. After that, we'll get into the step by step process I used to generate values and draw them on the map.
I separated my concerns into three general camps:
- The data itself
- The presentation of the data
- The coordinator between data and presentation
While I rarely get so in-depth as to use a detailed MVC (Model View Controller) framework, I use a rough version of this concept in pretty much every game or program I make. It's really convenient to be able to fiddle with the underlying data without affecting the way the data is displayed (or vice versa), and it also helps with debugging and refactoring later. Keeping the data and the visuals separate also makes the job of the coordinator (or controller) much easier, because it doesn't have to be concerned with the way things look or work. All it does is pull the right levers at the right time. It was important to get this foundational part of the project cemented first, before I concerned myself with any of the nitty-gritty of setting up the camera, processing the variables, and making the map itself.
The Coordinator — WorldGenerator Class
Since this was a relatively simple project, I decided to house everything in one scene: my world-generator.tscn scene. The root node of this scene is an extension of Node that is, unsurprisingly, called WorldGenerator. This is our coordinator, the wellspring from which all landmasses, views, and data would emerge. Nothing happens without the coordinator, just like a plane can't fly without a pilot.
WorldGenerator contains all the methods and properties (including any curves and noise generators) for setting the temperature, elevation, and humidity values for each tile, filling the seas, and designating biomes. It also contains the Input functions for generating new maps and toggling the different map views. Basically, any knob the player can pull or dial the player can tweak is present in the WorldGenerator node.
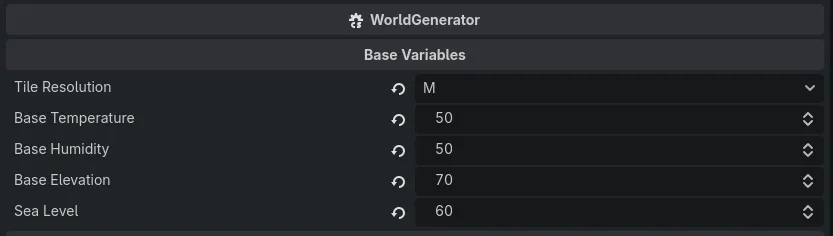
The only set of controls I expose to the user are the base variables. These are used to adjust the overall character of the generated world. We'll take a closer look at those in the next post, but this is what they look like in the editor:
 |
|---|
| The exported base variables in the Godot inspector. These are the dials the player can turn to generate different planets. |
The Data — Tiles, TileData, and TileNode
Now that I had my coordinator, it was time to figure out the data. My map is broken up into a series of tiles, each one containing a set of properties that define what's actually going to be on the tile. Originally, I had these tiles as separate Nodes that would be added to the scene tree, but after I realized that this would involve hundreds of thousands or millions of nodes (depending on the tile resolution), I quickly figured out that using nodes as my data structures was the worst possible way of doing this. Instead, I created a struct to define the data that would belong to each tile, called TileData:
public struct TileData
{
    public int x; // X coordinate
    public int y; // Y coordinate
    public int temp;
    public int humidity;
    public int elevation;
    public Biome biome; // Biome type, set later.
    public TileType tileType; // Ground or water, set later.
    public int distToWater; // Distance to water, set later.
}
The struct was great, but I needed a place to store and work with all my hundreds of thousands of tiles. Enter the TileNode class, an extension of Node2D that contains all my logic for storing, manipulating, and getting the values of each tile on the map. The main part of the TileNode class is an array full of TileData objects, readable from anywhere, but mutable only by the TileNode class. This makes it easy to iterate through all the tiles, set or get their properties, and display them on screen. Plus, it's much, much faster than using nodes in the scene tree.
I also added a few utility methods to the TileNode class, including methods for getting relative or "real" tile coordinates, getting surrounding tile information (which we'll use later for biome smoothing), and computing distance to water (which we'll also use later to help calculate humidity).
The View(s) — Map Layers and Map Nodes
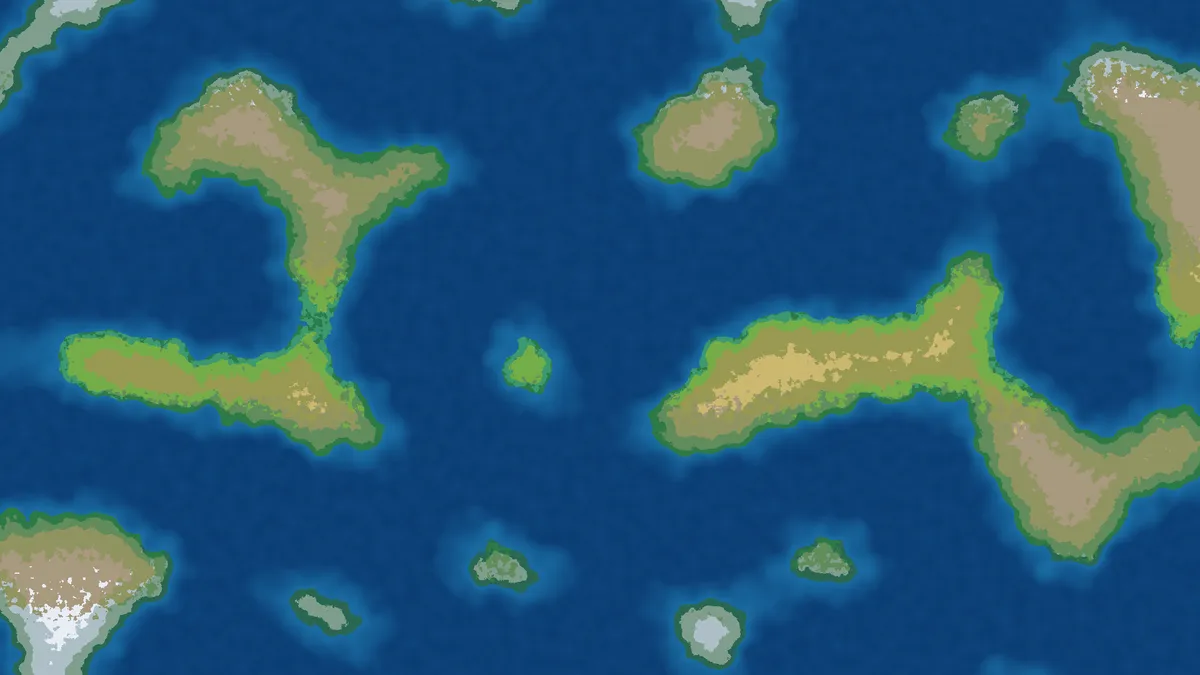
One of my goals was to allow the user to open different "variable views": versions of the map that showed temperature, humidity, or elevation. These views could be overlayed on top of the standard biome view to help the user (and me, the programmer) visualize the different variables at play. Having the different views also made it easier to debug different problems or see how my generation functions were actually affecting the map. It was way easier to look at a colored humidity map than to print out all the humidity values for a set of 10,000 tiles.
Because Node objects don't have a set of "visible" properties in a scene (like position, rotation, scale, etc.), and the WorldGenerator class is derived from Node, I couldn't use it to draw my tiles on the screen (nor did I really want to, since that would defeat the purpose of the whole MVC concept). Originally, I had a separate MapView node that took care of this, but later on I decided to scrap it in favor of my current setup: a set of CanvasLayers placed as children of the aforementioned TileNode, each of which is made visible or invisible by pressing a hotkey.
INFO
You may be wondering if this is a violation of the traditional MVC setup. Guess what: it is! I may go back later and separate the concerns a little more, especially the roundabout way that the
DrawTempsvariable is set (described below), but for now, it works. Since programming patterns are there to help, not to be rigidly adhered to, I think the Gang of Four will forgive me. This time.
To set up the variable views, I separated each view into its own CanvasLayer and Node2D-derived class. In each map node's script, I wrote an override of _Draw() that draws a specific color to a tile based on that tile's value and a preset Gradient. All I had to do was sample the gradient using the tile value as the offset, then draw the color onto a Rect2 using DrawRect().
Here's an example of this process for temperature:
public override void _Draw()
    {
        base._Draw();
        if (DrawTemps)
        {
            DrawTempMap();
        }
    }

public void DrawTempMap()
{
    GD.Print("Drawing temp map...");

    // Get the array of tiles from the tile node.
    ReadOnlySpan<TileData> tiles = _tileNode.Tiles;

    // Iterate though the tiles
    if (tiles != null && tiles.Length != 0)
    {
        for (int i = 0; i < tiles.Length; i++)
        {
            TileData tile = tiles[i];
            // Create a Rect2 using the tile coordinates (this is a separate method I made on the TileNode class)
            Rect2 rect = _tileNode.GetTileRect(tile.x, tile.y);

            // Normalize the temperature value so we can sample the gradient
            float normVal = Mathf.Remap(tile.temp, 0, WorldGenerator.MAX_PROP_VALUE, 0, 1f);

            if (TempGradient != null)
            {
                // Sample the gradient with the normalized value.
                Color c = new(TempGradient.Sample(normVal), a: 1);
                // Draw!
                DrawRect(rect, c);
            }
        }
    }
}
After that, I created a temp-view action in Godot's input map, then set up the WorldGenerator's _Process() method to toggle the DrawTemps bool when the action was pressed:
// WorldGenerator.cs
public override void _Process(double delta)
{
    // ...other stuff here
    if (_tileNode != null)
    {
        if (Input.IsActionJustPressed("temp-view"))
        {
            _tileNode.TempViewActive = !_tileNode.TempViewActive;
        }

        // ...still more stuff, including other actions
    }
}

// TileNode.cs
// This is called when TempViewActive is set.
public void ToggleTempView(bool on)
{
    if (on)
    {
        _tempMapLayer.Visible = true;
        _tempMapNode.DrawTemps = true;
    }
    else
    {
        _tempMapLayer.Visible = false;
        _tempMapNode.DrawTemps = false;
    }

    _tempMapNode.QueueRedraw();
}
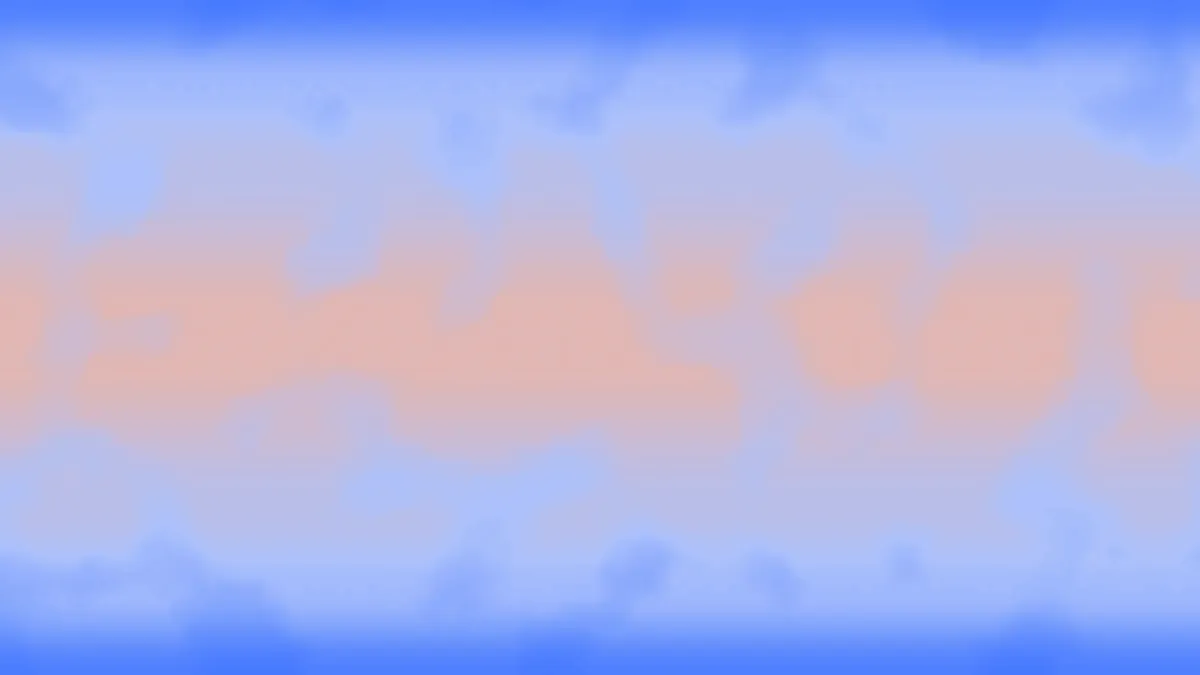
...and then we get this beautiful, toggle-able temperature map:
Up Next
That's pretty much it for the basic architecture of the map generation project! Next, we'll go step by step for each major variable: elevation, temperature, and humidity. We'll look at how each value is set using different types of noise and curves, and modulated using the rest of the TileData on the map. After that, we'll take a look at biome generation and setting up the camera.
Previous ||